Documents page
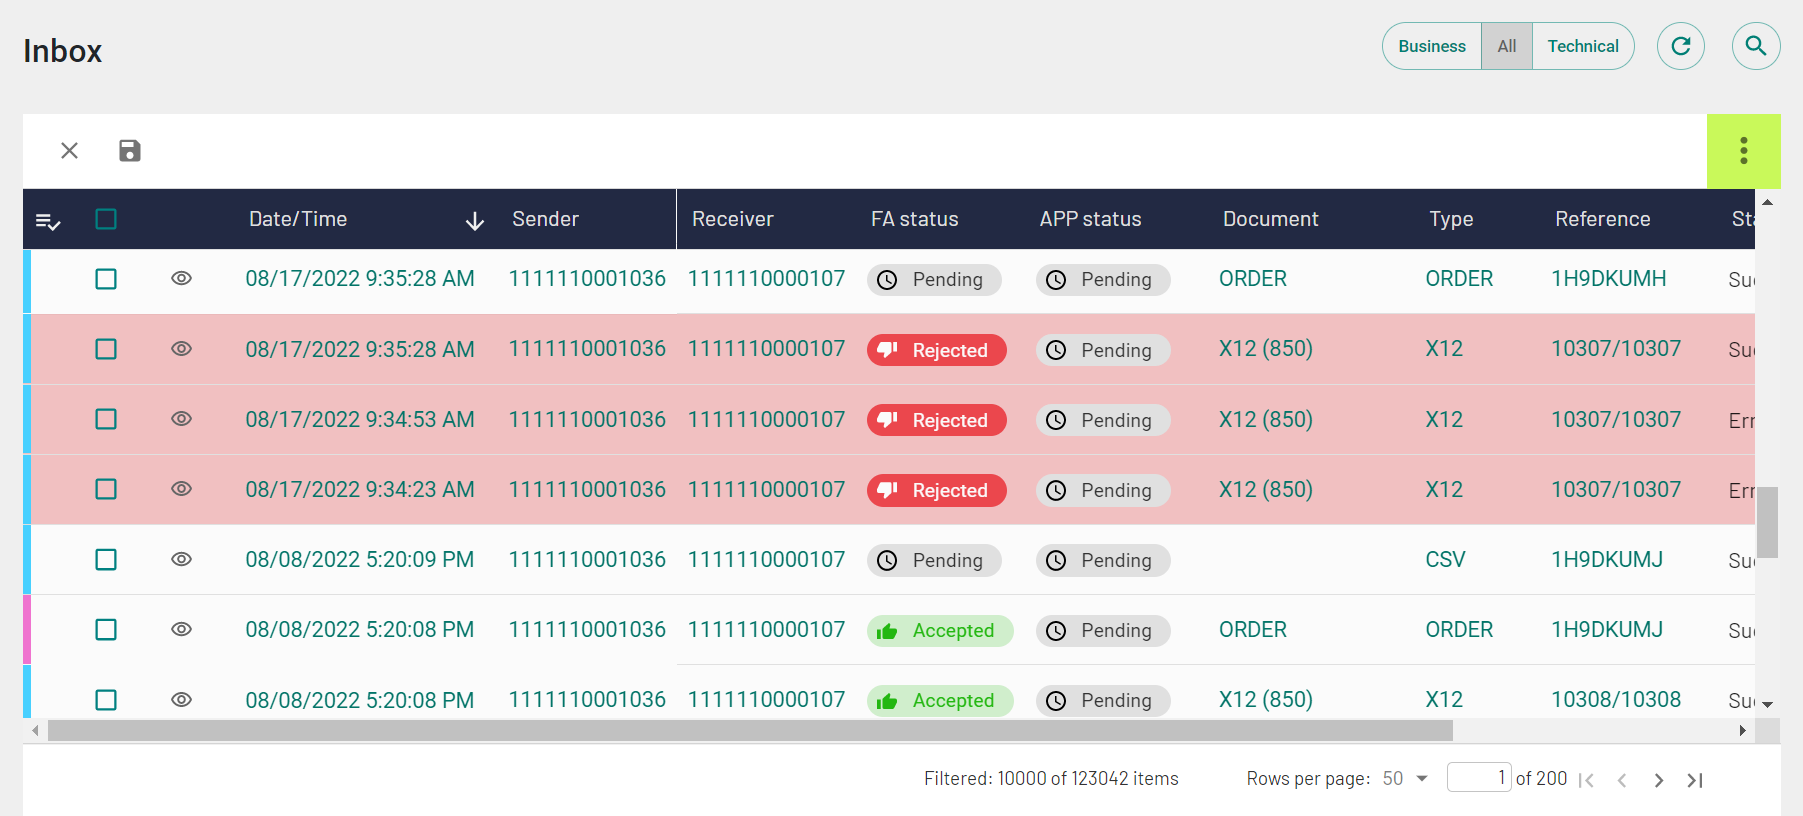
The Documents page contains a table that shows a current document exchange. The Documents page is patterned off a typical computer mailbox process.
You must have the View permission for the Documents parameter to see the Documents page. For more information about permissions and parameters, see Role management.
For the illustration of the Documents page, see Figure 1.
Documents page overview
Documents are categorized based on direction (inbound or outbound) and document type (business document or technical document).
- Business: To view only the business documents.
A business document contains the relevant information about a transaction in a human readable format. For example, an order gives the information that a business user looks for.
- Technical: To view only the technical documents.
A technical document contains interchange-related information, such as sender ID, receiver ID, control number, original file name, and so on. This is the actual raw data received from an external partner.
- All: To view both business and technical documents.
Document type buttons are available for Inbox, Sent, All, and any custom folders. Document type buttons are not available for Drafts and Outbox.
Search: Use the Search
![]() option to find any specific documents. For more information about searching for
documents, see Searching for documents by content.
option to find any specific documents. For more information about searching for
documents, see Searching for documents by content.
The Documents menu consists of five default categories.
- Inbox: Lists the inbound business documents (the single messages, but not the packed interchanges used in transfer).
- Sent: Lists the outbound business documents (the single messages, but not the packed interchanges used in transfer).
- All: Lists all the inbound and outbound business
documents and associated technical documents such as interchanges used in
transfer.Note: The Set ID and Format columns are not displayed for All.
- Drafts: Lists the saved outbound and turnaround business
documents.Note: Drafts are retained for 30 days from creation or last update, after which they are deleted.
- Outbox: Outbox contains a copy of outbound and turnaround
business documents while the transaction is in progress. If the transaction
succeeds, the document moves to the Sent folder. If the
transaction fails, the document remains in the Outbox
with the status Error. You can edit or delete the documents with the status
Error.Note: Drafts and Outbox folders are available if the Turnarounds or Outbound forms feature is enabled.
You can create sub-folders under Inbox, Sent, and All folders.
For EDI documents transferred via the routing process, EDX creates a business document for each transaction within the EDI document and displays the document number in the Reference column.
EDX displays a temporary document with the EDX-ID value that begins with a keyword API if the order document from e-commerce services, such as Shopify, fails to reach the back-end EDX system. You can reprocess this document to get valid data.
Documents table
The Documents table is customizable. You can modify a view of the table: sort column values (ascending and descending), show or hide columns, and drag columns around the table. By default, the table is sorted by date (from the newest to the oldest) and a date filter with the criteria Today is applied to the Date/Time column in the Inbox, Sent, and All folders.
To display a specific set of documents, define filters on the columns. You can define filters on all the available columns in the documents table. For more information about filtering documents, see Filtering documents
You can add or remove columns on the documents table. On the documents page, click the vertical ellipsis button and click Show columns. Select the checkbox beside a column name to add it to the documents table, and clear the checkbox beside a column name to remove it from the documents table. Click Show all to add all columns to the table, and click Restore default to restore default settings.
Select the checkbox on the Documents table column header to select all the documents. The selection is not limited to the visible page. It applies to all the pages of the documents table. If you select the checkbox when a filter is applied, it selects all the documents matching the filter criteria. The selection persists even when you change pages on the documents table.
You can use the clipboard ![]() functionality to copy values from the cells in the Documents
table.
functionality to copy values from the cells in the Documents
table.
You can view the details of a document, its activity log, acknowledgments, linked documents, and reprocess/resend events by clicking the document row. For more information about viewing documents, see Viewing document information.
To view the content of a document, click Show document
![]() on the document row.
on the document row.
Vertical sidebars on rows indicate the read or unread status of documents.
- A blue bar on the document row indicates that no one has read the document. The text of an unread document row appears in teal color.
- A pink bar on the document row indicates that other users have read the document but not you. The tooltip on the bar shows the list of other users who have read the document.
- A grey bar on the document row indicates that you have read the document. The tooltip on the bar shows the list of all users who have read the document. The text of a read document row appears in black color.
You can click the sidebar on a document row to change its read or unread status. You
can also use the checkbox on the header row (![]() ) to change the read or unread status of selected
documents. For instructions on filtering the read or unread documents, see Filtering documents.
) to change the read or unread status of selected
documents. For instructions on filtering the read or unread documents, see Filtering documents.
To filter read, unread and archived documents, click the Add filters icon in the header row of the documents table and select the option from the dropdown list.
If display names are turned on, display names for your partners and organization IDs
are displayed. You can also quickly edit the display names of senders and receivers
by clicking the Display names
 icon on the
Sender and Receiver columns. For more information about display names, see Display names.
icon on the
Sender and Receiver columns. For more information about display names, see Display names.
Use the page controls at the bottom of the documents table to navigate to the next, previous, last, or first page. You can also jump to any page by entering the page number and pressing Enter. Use the Rows per page option to set the number of document rows you want to view on each page.