Filtering documents
Filters are a quick and easy way to find and work with a subset of your data in a range of cells or tables.
The default view of the Documents page displays the table view. The filters that you can apply include the following:
- Date/Time: Date and time when a user sent a document. Click
the filter
 icon in the column to set the
Date/Time filter. You can set date and time ranges for the
filter. For the illustration of the Date/Time filter, see
Figure 1.Figure 1. The Date/Time filter
icon in the column to set the
Date/Time filter. You can set date and time ranges for the
filter. For the illustration of the Date/Time filter, see
Figure 1.Figure 1. The Date/Time filter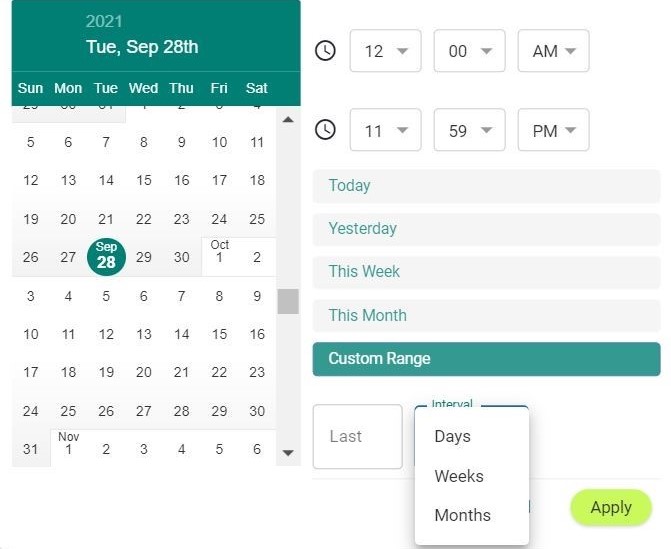 Note: Date and time are set to the time zone that is specified in your account settings. Read more about modification of account settings in Modifying EDX account settings.
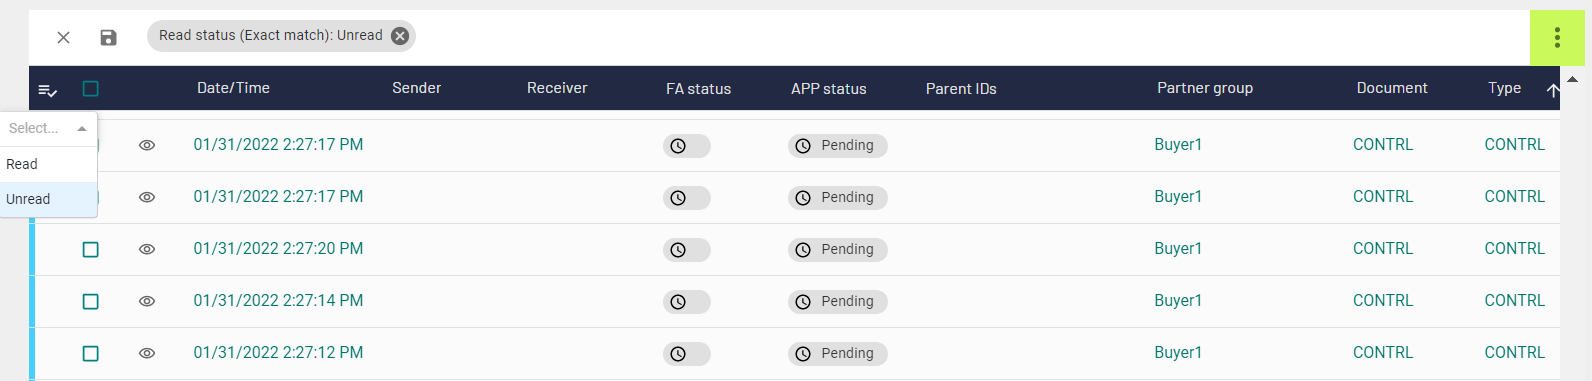
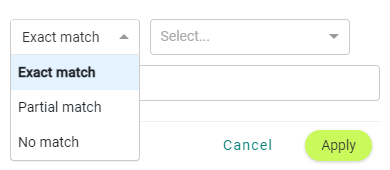
 - Complex filters: You can apply complex filters on non-numeric fields. To set
the filter, click the filter icon in the column, and select the filtering
criteria. Select Exact match to create a filter that uses an
exact value from the list of values. Select No match to create
a filter that excludes an exact value from the list of values. Select
Partial match to create a filter that uses a custom value.
Figure 2. Complex filter
Complex filters apply to the following columns:
- Sender: Name of a sender. You can create multiple
Sender filters.
Note: The Sender category can use display names.
- Receiver: Name of a receiver. You can create multiple
Receiver filters.
Note: The Receiver category can use display names.
- Partner group: The group entity under which several
partners are aggregated. The partners within a group can exchange messages with
each other. You can create multiple Partner group
filters.
Note: The Partner group category can use display names.
- Document: An exchange of information between trading partners.
- Type: The EDIFACT document type, such as X12, CONTROL,
ORDRSP, and so on. You can view the supported document types by filtering on
the Type column of Inbox.Note: The Type category can use display names.
- FA status: The EDI 997 acknowledgement status of a document (functional acknowledgement).
- APP status: The EDI 824 acknowledgement status of a document (application advice).
- Stage: Stage is applicable for messages and their
corresponding transmission files, in conjunction with the overall status of the
package. The two-step conversion process for a message includes import
conversion and export conversion. Typically, the converted message then gets
packed into a transmission file for being sent to your customer or trading
partner, depending on whether it is inbound or outbound.
You can set the additional conditions as follows:
- Complete: This stage is typically for inbound files that have been completely and successfully processed. All messages could have been extracted, converted, and sent.
- Export:
- If the status is Success, the message has been completely converted.
- If the status is Failure, the export converter failed.
- Import: This stage is for incoming messages that
have been imported during the first step of the two-step
conversion.Note: At this time, the message status is In Progress because export conversion is pending, but no status update is displayed for these files.
- Received: This stage is typically for messages whose overall status is Error. The message was received, but processing, routing, or import conversion failed.
- Send:
- If the status is Success, the data has been sent to your customer or trading partner.
- If the status is In progress, transmission is pending.
- If the status is Error, transmission failed.
- Done: This stage is typically for acknowledgement messages that do not need any further exporting or sending. These messages have been processed on the system.
- Fetch: This stage is typically for inbound
e-commerce files when receiving an order.
- If the status is In progress, the order is fetched from Shopify, and transmission to the EDX is in progress.
- If the status is Success, the order information is sent to EDX successfully.
- Fulfillment: This stage is typically for outbound
e-commerce files when processing shipment advice.
- If the status is In progress, the dispatch advice is received from the EDX back-end system and transmission to Shopify is in progress.
- If the status is Success, the dispatch advice information is successfully sent to Shopify for fulfillment.
- If the status is Failed, the dispatch advice information is sent, but Shopify failed to update fulfillment due to any reason.
- Error: This stage is typically used to indicate
transactions with errors.
The support team marks an error transaction as Done on the back end when they report that error to the customer. Once marked as Done, the Status column in the front end changes from Error to Success. To indicate that the transaction still has an error, the Stage column changes to Error.
Note: The Stage category can use display names. - Status: The overall status of a document exchange, such
as Success, In progress, or Error.Note: For CONTROL documents that are being reprocessed, the status might not be updated immediately on clicking the Refresh button. The status might initially change to In progress and then to Success or Error.
- Set ID: A unique identifier for a transaction as per the EDI standard.
- Format: A standard defined by different standard committees or institutes for the exchange of data electronically. Common formats include ANSI X-12, UN-EDIFACT, and VDA.
- Connection type: Identifies how EDX has established communications
protocol with your trading partner. Some of the connection types that you may
see:
- VAN – Value Added Network (VAN) identifies a third party network connection.
- Direct – Rocket has established direct communications with your trading partner using SFTP, AS2, or other as specified protocol.
- Reprocess/Resend: The reprocess or resend status of a document.
- Action: Manually or automatically marked action status of a document. This is different from overall status of a document exchange.
- Source: The origin of the outbound or turnaround document. For outbound business documents created from outbound forms, the source is Form. For turnaround documents, the document you are replying to is the source.
- Target: The transaction type which you are sending.
- Sender: Name of a sender. You can create multiple
Sender filters.
- Simple filters: Simple filters apply mostly to fields that hold numeric
values. To set the filter, click the filter icon in the column, and enter a value.
Simple filters apply to the following columns:
- Reference: Reference number.
- EDX-ID: Identifier of the package in the partner system.
- Interchange: A collection of groups and transactions (EDI messages) destined for one trading partner. An interchange may be comprised of one or many transactions enveloped in one or more groups.
- Author: The name of the user who created the document.
A list of applied filters is available at the top of the Documents table. Click the Delete icon on a filter to remove a filter from the list. To see all documents, click Clear filters.
You can add new columns to the Documents table. To add a column, click the vertical ellipsis button, click Show columns and select the checkboxes beside a column name.
To remove a column, click the vertical ellipsis button, click Show columns and clear the checkboxes beside a column name.
Click Show all to add all columns to the table, and click Restore default to restore default settings.