Viewing the list of groups
The company EDX administrator can create groups that represent customers. Only the group users can access documents relating to a group.
Prerequisites
About this task
A group represents an access scope. Groups can be nested. Users are associated with groups that define their scope of permissions.
For sign up requests to be properly routed to a group, the group must have a unique RequestCode.
You must have the View permission for the Groups parameter to see a list of available groups. This list includes your main group and all children of your group. You cannot update the settings of the group, but you can view the information about it. For more information about permissions and parameters, see Role management.
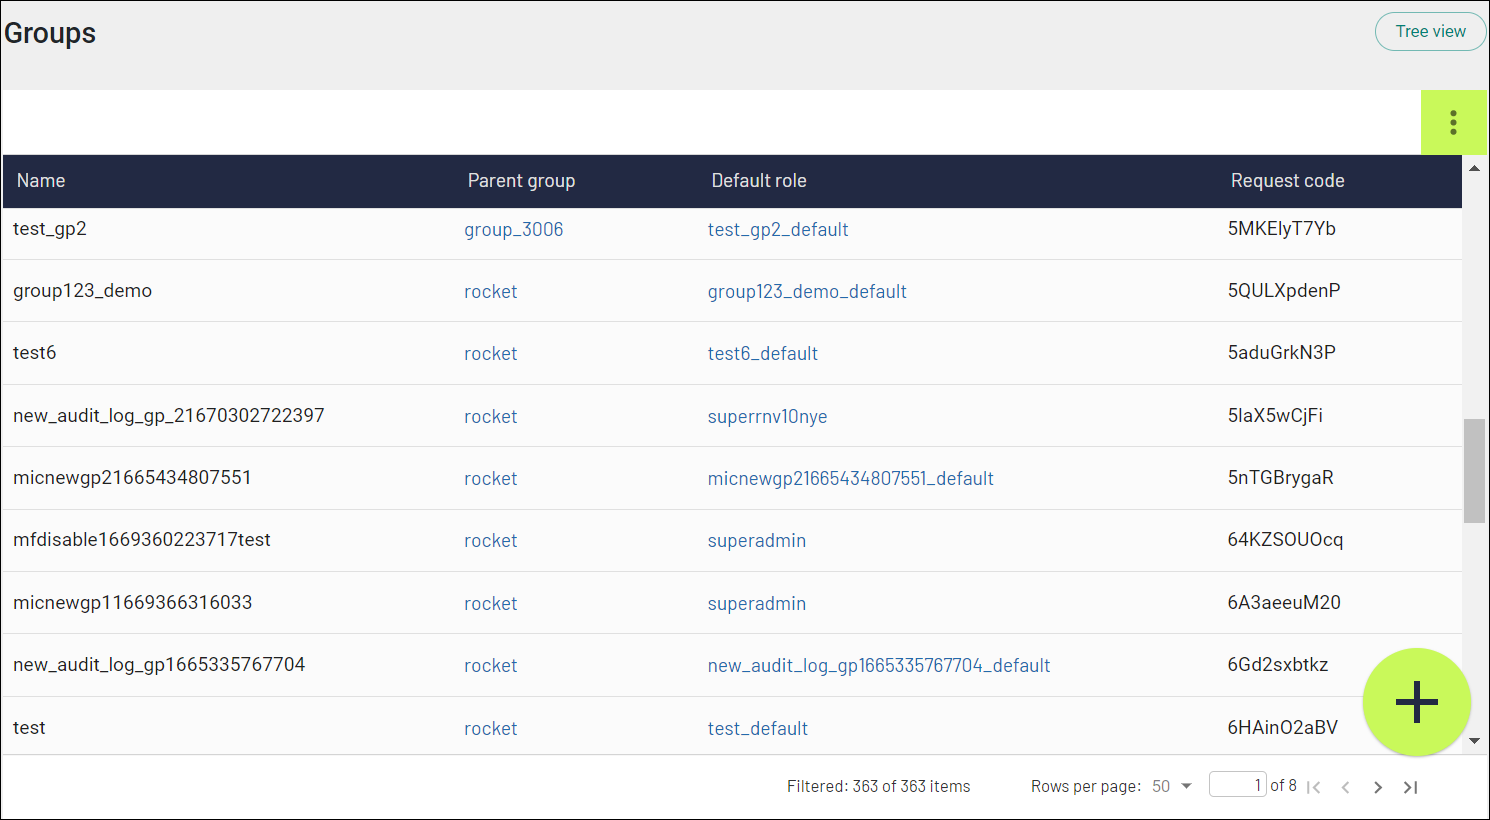
Navigate to . The Groups table includes the following categories that you can add as table columns:
- Name: User-defined name of the group. You can use this category as a filter.
- Parent group: Parent of the group to which you belong. To view information about the group, click the corresponding link in the table.
- Default role: Role that is assigned to a new user after registration. This role can be assigned during moderated user registration. If this field is empty, users can access only the User preferences window. For more information about user creation, see Creating users in EDX.
- Request code: Authentication code that is required for a user to join a specific group. You must have the View permission for the Request code parameter. You can use this category as a filter.
The Groups table is customizable. To modify a view of the table, sort column values (ascending and descending), add or remove columns, and rearrange columns. For the illustration of the Groups table, see Figure 1.
You can filter the content of the Groups table. Filters for applied filters are displayed at the top of the table. To clear all filters, click the Clear filters button.
You can enable and make visible categories that you need in the Groups table. Click the Add group icon that is in the upper-right corner of the table, and select necessary check boxes. By default, only Name and Parent group categories are enabled.
You can use special controls to quickly select all categories (Show all), clear all categories (Show none), or restore the default set of categories (Restore).